Showing posts with label Sewing. Show all posts

Thursday, April 25, 2013

Squid

My son is super into squids right now. He wants to be a marine biologist, specifically studying the Giant Squid. He has decided upon his major, college choice, and future graduate work. This is awesome. Especially since he's 10. :) Granted, I picked my major when I was 12 (and got my degree in it) so it's entirely possible he'll see it through.

For now, he is constantly drawing squids, his pinewood derby car was a squid, and he and his best friend design submarines at recess everyday.  So, when I needed to come up with a birthday gift for him that could be made cheaply at home, I thought it'd be fantastic to make a stuffed squid for his bed. 

To say that he LOVES it would be an understatement. 


Personally, I'm rather proud of myself for thinking to use polka dot fabric for the suction cup sides of the arms and tentacles (he informs me that they're not all tentacles, only the long ones are). 

I didn't have a pattern, I just sketched out what I thought the squid should look like, added 1/2 inch seam allowances to my sketch, and cut it out.


It was a great scrap buster.  I used leftover polka dot fabric from this dress and gray fabric leftover from the Dumbledore costume from a couple Halloweens ago.  The eyes (one on each side) were made of felt I had in my stash. 
 
 
I sewed everything right sides together and stuffed it.  I basted it together as I assembled it, as working with all those arms was rather complicated--too complicated for pinning. 
 
 
I really love how it looks sitting on top of his green bedspread.  I'm proud of my little squid.  :)
 

seven thirty three

Tuesday, October 2, 2012

Lace Skirt Tutorial


In August, I had the great opportunity to make bridesmaid skirts for a wedding.  The Mother of the Bride is a friend of mine and she brought me the fabric she'd picked out and asked me if I could make some skirts with it, to her specifications.  The Bride's sisters were going to be in cute green Downeast skirts, and the Bridesmaids were to wear pink skirts that were to be similar to the Downeast skirt, but a little longer and a little poufier.  

Cute Kylie, one of the sisters of the bride:

The bridesmaids were super-cute girls, too!  

I made the skirts out of a beautiful white lace the bride's mom found, layered with a pink lining and a top layer of light pink tulle, all attached to a black elastic waistband.  
They were pretty simple to make, though making 5 at once took a bit of patience.  All that tulle to cut!  :) 

I didn't have a pattern, so I figured out a mathematical formula to have each skirt look the same as the rest, but still fit each bridesmaid.  I took each girl's waist measurement and calculated what the hem should be.  

For the lining layer, which was a little narrower than the lace and tulle on top, I multiplied the waist measurement in inches by 1.12.  The lining was 24.5 inches long. 

(Waist Measurement x 1.12) + 1 = Hem Width for Lining

For instance, this piece of lining was 33.6 inches by 24.5 inches, for a girl with a 30 inch waist.  Make sense?  (And yes, the fabric in the below picture was cut a little crooked.  Oops!  I straightened it up before sewing it, though. :) )


The lace and tulle were the same size as each other, and slightly larger than the lining.  The equation for the lace and tulle is: 

(Waist Measurement x 1.36) + 1 = Hem width for Lace/Tulle

The length for the tulle/lace was 26.25 inches, so the scallop on the lace would be more visible over the solid pink lining.  So, for a girl with a 30 inch waist, the lace and tulle was 40.8 inches by 26.25 inches.

Who says you don't use math in every day life, right?

For each skirt, I cut two lining pieces, two pieces of lace, and four pieces of tulle.   

So, here's how I made the skirt.  

After everything is all cut out (the biggest part of the whole process), sew the two lining pieces at the sides (using half inch seam allowances), with right sides facing together.  Trim, finish (I zig-zagged) and press the seams, then sew a narrow hem on the lining.  


Next, sew the two pieces of lace down the sides (right-sides-together).  Trim, zig-zag, and press the seams.  I didn't need to sew a hem on the lace because it had a lovely scalloped finished edge.


Then, sew the 4 pieces of tulle together on the sides.  (I didn't get a picture of this step...oops!)  The tulle layer is doubled up so the pink would show (with only one layer, it was nearly invisible).  Trim, and press the seams.  

After your 3 skirt layers are sewed together and hemmed if needed, prep the waistband.  I think the elastic I used was 3 inches...it may have been 2.5 inches wide.  The length of the elastic was the girl's waist measurement + 1 inch.  (So, for a girl with a 30 inch waist, that would be 31 inches of elastic).  

Fold the elastic in half lengthwise, with cut ends together, right sides facing each other.  Sew together with a 1/2 inch seam allowance.  

Press open the seam in the elastic (on a cool iron setting so you don't melt it!) and stitch the sides of the seam down.


Layer your tulle layer and lace layer together the way you want them, matching up side seams where possible.  (Put the lace inside the tulle "skirt").  Machine baste the top of the lace/tulle skirt.  Pull threads to gather the fabric to the size of your waistband.  Adjust gathers the way you want them to look and pin the lace/tulle skirt to the waistband.  Sew the skirt to the waistband, pulling slightly on the elastic as you sew, so your threads don't break when the elastic stretches as you wear the skirt.  


As the lining is slightly smaller than than the lace/tulle layer, I gathered it separately.  Repeat the above process with the lining, making sure that when you pin the lining to the waistband that the side seams match up with the side seams in the lace/tulle.  Sew the lining to the waistband slightly above the stitches where you sewed on the lace/tulle, again stretching the elastic a bit as you sew.  

 
Trim the excess fabric inside the waistband (I wish I'd gotten a picture so this makes more sense--there will be a ton of fabric above your stitches on the inside of the waistband, because the fabric was gathered.  Trim it close (like 1/4 inch) to your stitches so it looks nice.  Zig-zag it if you want (or serge it if you've got one of those fancy sergers!).)

Clip all your threads, shake it out, iron it, and you've got a pretty layered lace and tulle skirt!

Monday, April 16, 2012

Quick Zipper Pull

Hi, I'm back! Please forgive my two-week absence, my family and I took a lovely trip for Spring Break. Now that I'm back and getting back on top of things, it's time for a new blog post!

Do you ever lose your zipper pull? The one on my purse, a nice leather pull, is about to come off the zipper entirely. I've been thinking for awhile about how to replace it when it inevitably breaks off. I suddenly had the solution, as I was packing my boys for our trip. I don't know why I didn't think of it before. And, you all will probably wonder why I'm bothering to blog about it...I bet you've already thought of it. :)

As I was packing, I noticed that my little guy's backpack was missing its zipper pulls, too.  Once upon a time I'd replaced the pull with a safety pin, to give me something to pull to zip it shut, but it kept opening and poking my hand.  Not the safest option.


Instead, I used ribbon!  I threaded a little grosgrain ribbon that I had lying around through the zipper and sewed it together at a couple points (um...really quickly, which is why it's so crooked.  I was more interested in speed than appearance at this point.  If I had been, I probably would have bothered matching the thread, too.).  Voila, a new zipper pull!


Tuesday, February 21, 2012

Simplicity 2475

I got a great blouse from Old Navy for my birthday. It has sweet little red butterflies all over it. I knew it would look great with a red pencil skirt.


To make it, I pulled out my go-to pencil skirt pattern, Simplicity 2475. I used it before to make a yellow pencil skirt:

That yellow skirt was the first clothing item I'd made from a pattern in nearly a decade.  It was rather nice as I made my red one this time around to see the improvements I've made in my sewing skills.  The first time around I was frustrated by the pattern-ese language in the directions.  The second time?  I tossed the instructions aside entirely and did it my own way.  :)

It's pretty simple, but that's the point with a pencil skirt, no?  It does have cute kick-pleats in the back to jazz it up a little.  I really like them.


I capped off the outfit with some cute off-white heels and had a cute springy outfit for church this week. Now if spring would actually come...


Friday, January 27, 2012

Toddler Apron

I have several fun dresses on my mind that I want to sew soon. But, first, I've been taking a little bit of a break from sewing. Sewing on a deadline can take it out of you a little. :) So, I'm catching up on some stuff and spending more time with my family, both things that got just a little bit ignored during the SYTYCS competition.  :)  (In case you haven't heard...I was eliminated in round 3, only one vote short of making the top 3.  That I got that far with my little bitty blog here is pretty amazing, so thank you everyone for your support!). I hope to start a skirt on my to-sew list in the next week, though.

But, I'm getting a little tired of seeing my pretty yellow dress at the top of my blog. :) So, I thought I'd post about this cute apron I made my 2-year-old niece for Christmas.


I love that cute food fabric (from Walmart!) and how the blue broadcloth pulls out the blue in the waistband.  And, it was super simple. It's just a gathered rectangle attached to a waistband. It probably took me 20 minutes. Don't you love super-quick projects? Instant gratification! :)


Tuesday, January 17, 2012

SYTYCS Entry, Week 3: Fair and Lemon Square Dress (and Tutorial!)


ModCloth's Fair and Lemon Square dress has been on my wish list for a long time.  It's adorable.  It's my favorite color.  And, its $75 price tag is out of my budget.  So, I decided to try my hand at making it myself.

Here's how I did it.  First, since patterns aren't allowed in the So You Think You Can Sew competition, I spent quite a bit of time drafting my own pattern.  I'm so glad I bought a french curve awhile back!  It was so helpful in drawing the right lines and curves.  I went through a few drafts (especially while trying to figure out how to work the darts) and fit my drafts to my dress form to make sure I was on the right track.  I used my three year old's finger painting paper--it was the perfect size!  After several tries, I finally ended up with a usable pattern.    

The bodice front (left) and bodice back (right).

The collar:

The sleeve:

I used a pretty yellow cotton sateen as my fabric, about 4 yards.  I cut the bodice front out, with the straight side (middle) on the fold.  (I cut two, since I lined the bodice.  All of my instructions for the bodice are the same as the lining; you just do everything twice, so you basically have two bodices that you will put together later on.)

I marked the darts with pins.

I matched up the pins and sewed the dart, making sure to leave extra thread at the point of the dart so I could tie a knot and avoid the bulk that back-stitching would have made.


I then pressed the darts.

For the back, I cut two (4 if you count the lining) of my back bodice pattern.  I marked the darts in the same way, sewed, and pressed.


I then, with right sides together, sewed the bodice back to the bodice front.  I pinned and sewed at the sides:

And at the shoulders:
Then I pressed my seams open:

Here's what I ended up with:
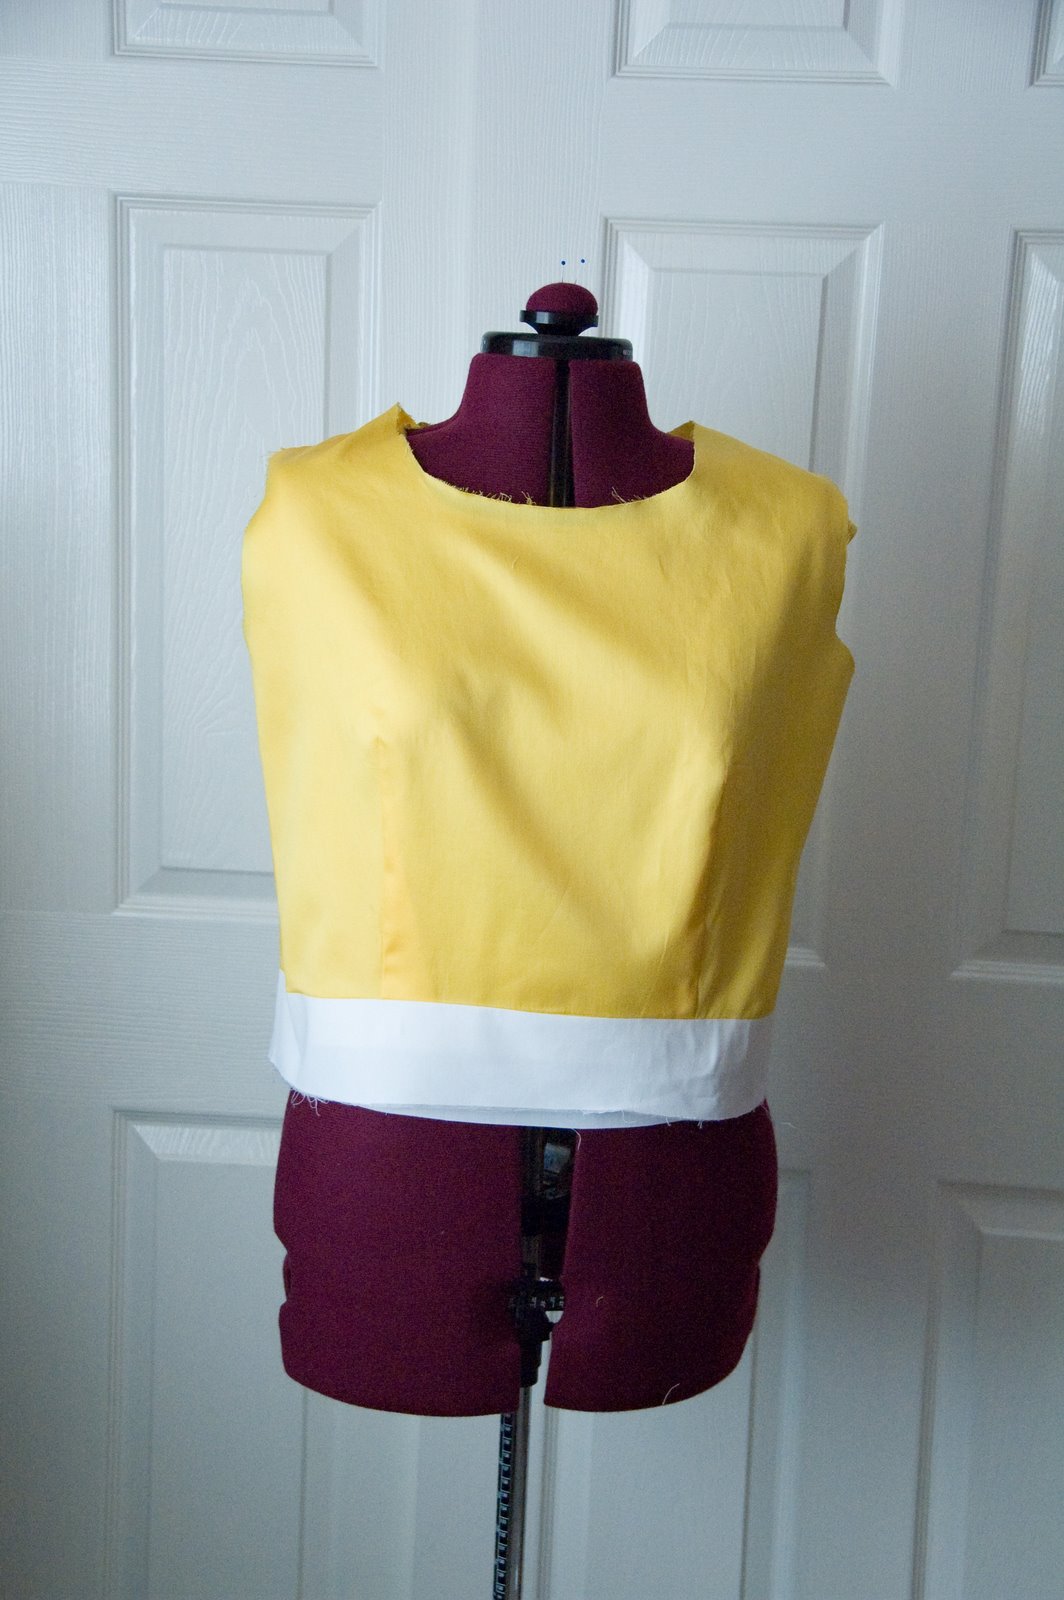
I cut a waistband out of my favorite white cotton: Walmart's Teeshot cotton.  The waistband measured 34 inches by 3 inches.  I added some medium weight iron-on interfacing to it (but not to the one for the lining).  Then, I pinned (right sides together, again) it to the bodice and sewed it on (nearly all of my seams were sewed with 5/8 inch seam allowance).


Once the waistband was attached, I pressed it open.  Here you can see the bodice and waistband layered over its lining on my dress form:
At this point, I added part of my zipper (a 22 inch invisible zipper).  Ordinarily, I'd wait until the skirt was attached, but I wanted to try it on before I got too far to make sure my fit was working out okay.  After the zipper was attached (just follow the instructions on the package) I pressed the seams.

Next, I cut out the skirt.  The front of the skirt was 31 x 25 inches.


I cut two of the skirt back so I'd have a center seam for the zipper to go in.  The skirt backs were each 17 x 25 inches.
I sewed the skirt backs to either side of the the skirt front (and pressed open the seams).


Using the largest stitch length on my machine, I machine basted the top of the skirt.

Using the basting, I pulled and gathered the skirt.  I matched the side seams on the skirt to the side seams on the bodice and evenly distributed the gathers between the seams.  I then pinned the gathered skirt to the waistband (as always, right sides together).
Here's how it's looking so far:
Next, I made the collar.  I cut out four collar pieces and covered two of them with fusible interfacing.

I pinned each interfaced piece to an un-interfaced piece (right sides together).  I stitched around the sides and bottom of each collar piece.  I clipped the corners and curves before turning.  I pressed the collar (being sure to poke out the corners before pressing).  I then top-stitched around the sides and bottom of the collar.


I pinned the collar where I wanted it on the bodice.
And then, this is where we'll use the lining.  Up to this point, the lining should be exactly the same as the bodice, except its waist band doesn't have interfacing and it doesn't have a collar.

Press under the bottom of the lining's waistband 5/8 of an inch.

Place the bodice (complete with pinned-on collar) and the bodice lining right sides together, making sure to line up all seams, edges, and darts.  Pin the lining to the bodice at the neckline and stitch together.

After stitching, turn it right sides out and press the neckline.

Press under where the lining meets the zipper and pin it to the zipper.  Pin the bottom of the lining to the seam allowance from the skirt.  Hand stitch the lining to the zipper and the skirt's seam allowance, so none of your stitches are visible from the outside of the dress.


Now it's time to put some sleeves on the dress.  I cut out two of the sleeves, with the straight side on the fold.
I hemmed the bottom of the sleeve (on the left in the above picture) with a narrow hem.  Then, I machine basted around the top curve of the sleeve and gathered a little to give a little ease to the sleeve (so I can move my arms!).  I sewed the sides of the sleeve together (right sides together) and pressed the seam open.

I matched the sleeve seam to the side seam under the arm hole in the dress and pinned it.  I then matched the top of the sleeve to the shoulder seam.  I pinned the rest of the slightly-gathered sleeve to the rest of the arm hole in between the two seams.


Sew on the sleeve.  Repeat process on the other sleeve.
Turn the sleeve right side out and press the seam.

The last part of the main dress construction is to hem the skirt.  I tried on the dress and marked where I wanted my hem to be.  I measured, pressed, pinned, and stitched the hem.

Now comes the fun part--putting on the embellishments!  I bought some larger buttons to cover with fabric.  I used the same teeshot white as the collar and the waistband.  I followed the instructions on the package to cover the buttons.  It was actually really easy.  And it was pretty fun to hear the "snap!" of the back locking in and pulling out a perfect fabric-covered button.  Yay!

I centered the top button between the two sides of the collar and sewed it on.  I measured where to place the other buttons so they would be evenly spaced and sewed them on, too.

I made the bow for the waistband so quickly that I forgot to measure it.  It's around 2x4 inches or so.  I cut out two rectangles of the white fabric and interfaced one of them.  I stitched them together, right sides together, leaving the end open for turning.  I clipped the corners, turned it, and pressed it.  I folded in the end left open and stitched it closed, continuing around the edge of the whole rectangle with some decorative top-stitching as well.

I pinched it together in the middle and hand stitched it into a bow shape.  I then made a loop of fabric to go around the middle of my bow and hand stitched it on.  I stitched it to my waistband and then I was done with my dress!

I'm really loving this dress.  I can't wait to get to wear it more (um...it was bitterly cold and windy when my hubby and I took pictures of it yesterday...SO. FREEZING. COLD.  So, yeah, this is a spring dress...).    :)  Its bright yellow and cute details make me happy.  :)   And, at a fraction of the price of the original (fabric and materials came to around $17, thanks to a 50% off coupon at JoAnn Fabrics!), I'd say it was totally worth it to make it.


This week's votes determine who will be in the top 3.  So, I really need all the votes I can get.  :)  Voting is open now at Mommy By Day Crafter By Night  and will continue until Thursday night.    Voting is now closed.  

Related Posts Plugin for WordPress, Blogger...