Showing posts with label Jewelry. Show all posts

Tuesday, May 24, 2011

Pink and Gray Necklace and Tutorial

Necessity is the mother of invention, yes?  I find that my best creations come when I'm trying to fill some specific need, rather than crafting for crafting's sake.  This time, it's my Pink and Gray Necklace.  My Brother-in-law is getting married this summer.  Their colors are pink and silver/gray, so I wanted to wear a dress to their wedding that coordinated with their colors.  I finished that dress this week (post coming soon!), but it needed a necklace.  I had the perfect idea in my head of what I thought would look good with it, but couldn't easily find a necklace like what I wanted.  So, I made one. 

And, I had the forethought to take pictures as I made it, so you get to see how to make one too! 

To make this necklace, you'll need some monofilament, two jump rings, your desired number of beads (I used 17), and 36 inches of ribbon.

Begin with a jump ring.  Mine isn't exactly a jump ring, but it's what I had on hand.  Tie some monofilament to your ring.  (I just use fishing line, it's a lot cheaper than buying monofilament at a craft store.)

Next, string on your beads.  The rest of the necklace will be ribbon, so you don't need the length of beads to fit all the way around your neck. 

After your last bead, tie another jump ring onto your monofilament.  Snip any extra monofilament off. 

Thread ribbon through each jump ring.  I used about 18 inches of ribbon, folded in half (to make a length of 9 inches after tied onto your necklace), for each side. 

Tie a neat knot in the ribbon over each jump ring.

Tie the ribbons around your neck in a pretty bow and wear your new necklace!


Tuesday, April 5, 2011

Pink Plaid Dress


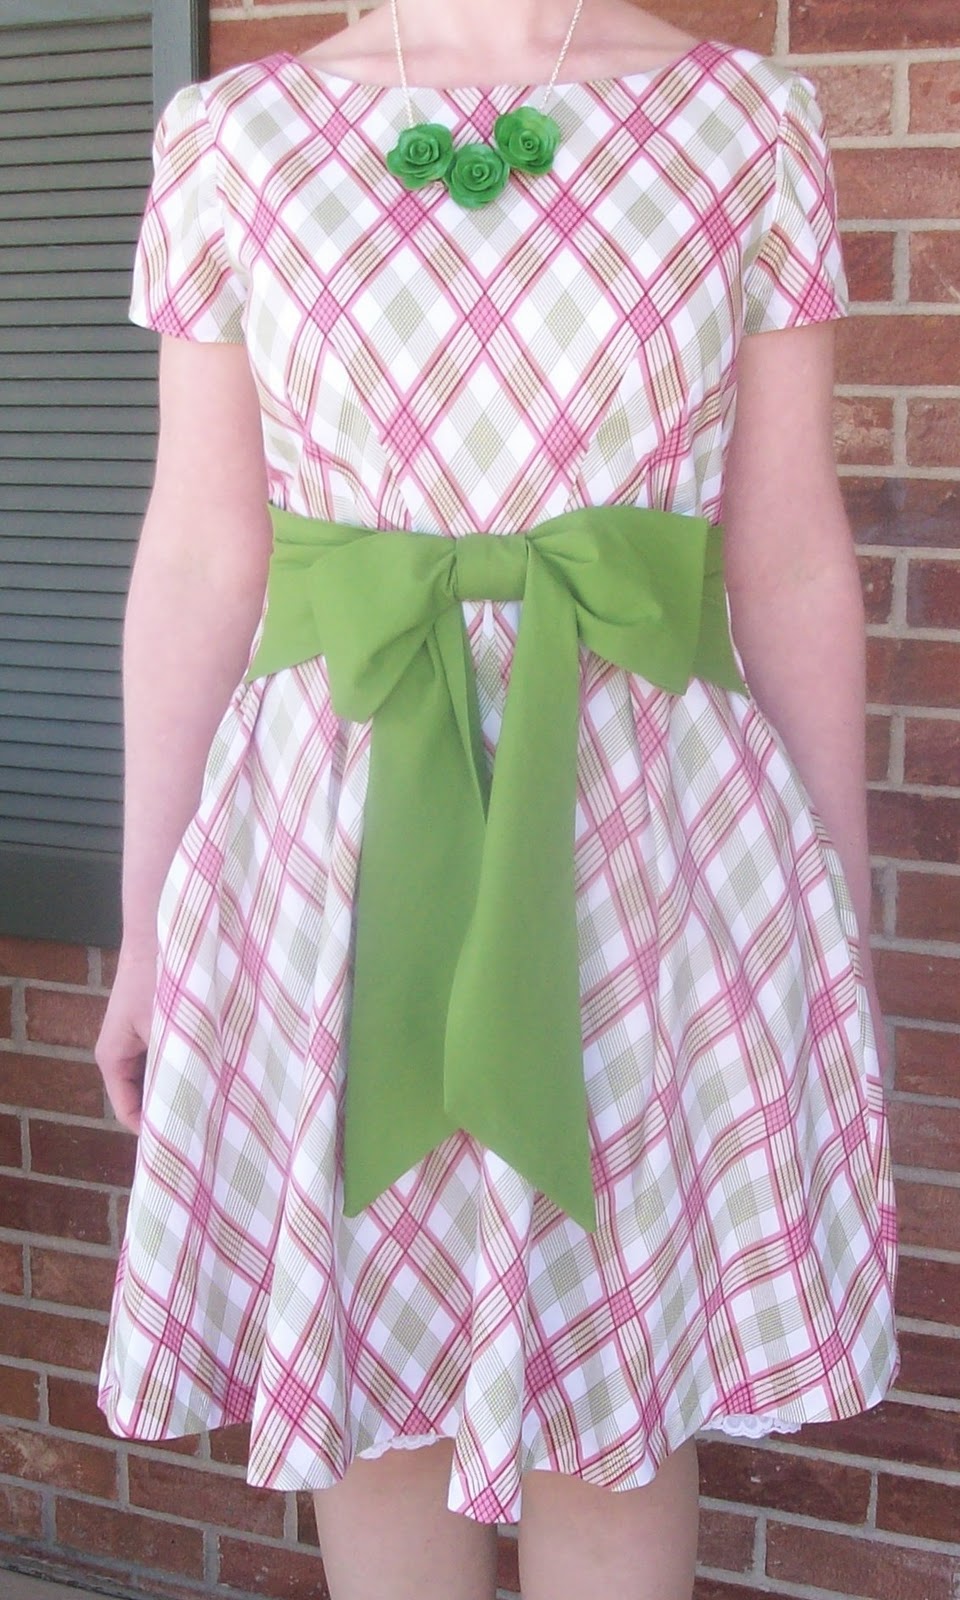
This dress is my latest creation. It's made from Simplicity 2444.  And, check it out:  It has pockets!  I love dresses that have pockets.  :)


I thought it needed a necklace, with that higher neckline--a little bit more visual interest across that field of plaid..  But, I didn't have any necklaces that looked right.  So, I went back to my trusty Sculpy roses, and made another necklace!
This time, I took pictures as I went and I'm putting together a tutorial for you, so you can make your own rose necklace!  Look for it later this week or early next week!

Linking here.

Wednesday, March 30, 2011

Rose Necklace

Several months ago, some friends and I were sitting around talking and joking and somehow we got talking about how cool it would be if we had a "Prom." Well, we actually carried out our idea and had a Couples Night Formal.  It was AWESOME.  I haven't had that much fun in a long time.  It was like taking all the good things from high school and college formals and stake dances and leaving out all of the bad things.  I had a blast. 

Most of us wore old high school and college formals.  Mine was an old bridesmaid dress.  I couldn't find a necklace I liked to go with my dress, though, (and I didn't want to look like a 29 year old trying to look like a 16 year old, so I eschewed my old rhinestones and "formal" necklaces).  So, I made one. 

I wanted to make a necklace using those lucite flowers I've been seeing a lot on Etsy these days, but didn't have the forethought to order any online ahead of time (and they're not available in local stores).  So, I made my own flower bead with Sculpy and made my own necklace. 

I thought it turned out beautifully, and have made another one to go with another dress, and will be posting a tutorial for the flower beads soon.  :)


Related Posts Plugin for WordPress, Blogger...