


ModCloth's Fair and Lemon Square dress has been on my wish list for a long time. It's adorable. It's my favorite color. And, its $75 price tag is out of my budget. So, I decided to try my hand at making it myself.
Here's how I did it. First, since patterns aren't allowed in the So You Think You Can Sew competition, I spent quite a bit of time drafting my own pattern. I'm so glad I bought a french curve awhile back! It was so helpful in drawing the right lines and curves. I went through a few drafts (especially while trying to figure out how to work the darts) and fit my drafts to my dress form to make sure I was on the right track. I used my three year old's finger painting paper--it was the perfect size! After several tries, I finally ended up with a usable pattern.
Here's how I did it. First, since patterns aren't allowed in the So You Think You Can Sew competition, I spent quite a bit of time drafting my own pattern. I'm so glad I bought a french curve awhile back! It was so helpful in drawing the right lines and curves. I went through a few drafts (especially while trying to figure out how to work the darts) and fit my drafts to my dress form to make sure I was on the right track. I used my three year old's finger painting paper--it was the perfect size! After several tries, I finally ended up with a usable pattern.

The bodice front (left) and bodice back (right).

The collar:

The sleeve:

I used a pretty yellow cotton sateen as my fabric, about 4 yards. I cut the bodice front out, with the straight side (middle) on the fold. (I cut two, since I lined the bodice. All of my instructions for the bodice are the same as the lining; you just do everything twice, so you basically have two bodices that you will put together later on.)


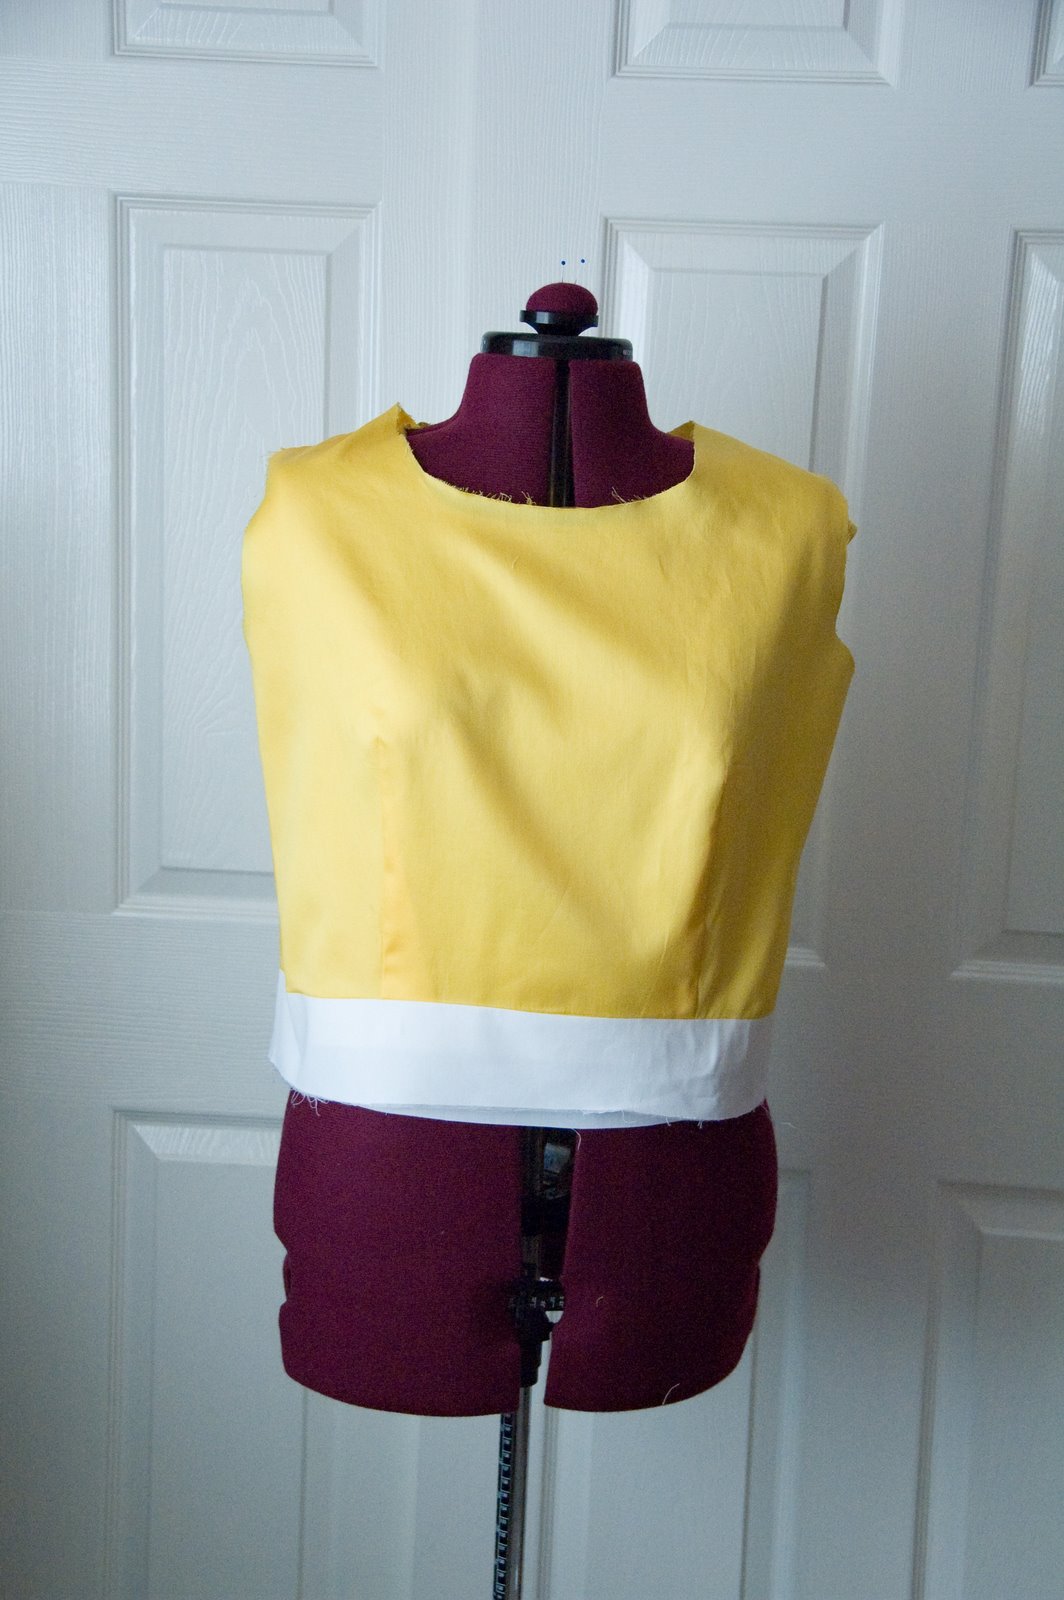
I then, with right sides together, sewed the bodice back to the bodice front. I pinned and sewed at the sides:

And at the shoulders:


Here's what I ended up with:


Once the waistband was attached, I pressed it open. Here you can see the bodice and waistband layered over its lining on my dress form:


I cut two of the skirt back so I'd have a center seam for the zipper to go in. The skirt backs were each 17 x 25 inches.


Using the largest stitch length on my machine, I machine basted the top of the skirt.

Using the basting, I pulled and gathered the skirt. I matched the side seams on the skirt to the side seams on the bodice and evenly distributed the gathers between the seams. I then pinned the gathered skirt to the waistband (as always, right sides together).


I pinned the collar where I wanted it on the bodice.

Press under the bottom of the lining's waistband 5/8 of an inch.
Place the bodice (complete with pinned-on collar) and the bodice lining right sides together, making sure to line up all seams, edges, and darts. Pin the lining to the bodice at the neckline and stitch together.

Press under where the lining meets the zipper and pin it to the zipper. Pin the bottom of the lining to the seam allowance from the skirt. Hand stitch the lining to the zipper and the skirt's seam allowance, so none of your stitches are visible from the outside of the dress.

Now it's time to put some sleeves on the dress. I cut out two of the sleeves, with the straight side on the fold.

I matched the sleeve seam to the side seam under the arm hole in the dress and pinned it. I then matched the top of the sleeve to the shoulder seam. I pinned the rest of the slightly-gathered sleeve to the rest of the arm hole in between the two seams.

Sew on the sleeve. Repeat process on the other sleeve.

The last part of the main dress construction is to hem the skirt. I tried on the dress and marked where I wanted my hem to be. I measured, pressed, pinned, and stitched the hem.
Now comes the fun part--putting on the embellishments! I bought some larger buttons to cover with fabric. I used the same teeshot white as the collar and the waistband. I followed the instructions on the package to cover the buttons. It was actually really easy. And it was pretty fun to hear the "snap!" of the back locking in and pulling out a perfect fabric-covered button. Yay!

I made the bow for the waistband so quickly that I forgot to measure it. It's around 2x4 inches or so. I cut out two rectangles of the white fabric and interfaced one of them. I stitched them together, right sides together, leaving the end open for turning. I clipped the corners, turned it, and pressed it. I folded in the end left open and stitched it closed, continuing around the edge of the whole rectangle with some decorative top-stitching as well.

I'm really loving this dress. I can't wait to get to wear it more (um...it was bitterly cold and windy when my hubby and I took pictures of it yesterday...SO. FREEZING. COLD. So, yeah, this is a spring dress...). :) Its bright yellow and cute details make me happy. :) And, at a fraction of the price of the original (fabric and materials came to around $17, thanks to a 50% off coupon at JoAnn Fabrics!), I'd say it was totally worth it to make it.


44 comments:
Amazing! and you look wonderful in it!
Beautiful! (Both you and the dress). Great job.
Wow! It turned out really well! It totally looks like you used a pattern for it, not like you just whipped it out all by yourself -- I don't know if I'd be brave enough to do that for a dress for myself, but maybe for a little girl's dress. :)
You did a great job! It's beautiful!
Briana @ babblingsandmore.blogspot.com
I love the colour! You did a fantastic job, your dress is gorgeous!
Wow, what a beautiful dress. It boggles my mind that you can do that without a pattern.
Seriously? Without a pattern? Ok, you get that you're just making the rest of us look bad, right??? heheh Great job!!!
How cute is that! I am in love with it. Such a girly dress, totally my style. I am pinning it.
Okay so that is seriously gorgeous! Thanx for sharing the tutorial! It's lovely!
Natalie
www.projectdowhatyoulove.wordpress.com
This is such a cute dress... I love it and the colors are great.
Greetings from Germany
Catrin
This is such a cute dress... I love it and the colors are great.
Greetings from Germany
Catrin
That is adorable-I'd pick you as the winner.
This dress is too cute. I wish I had your talent. Maybe someday I'll be brave enough to try it. Thnaks fo showing us.
Very sweet dress. I love the style of it, like the older style pattern. Nice and bright. Kathi
Jenny I just voted for your dress. Seriously.....you absolutely amaze me! What a marvelous talent you have. I love to sew, but I can't do it without a pattern and even then I can't really do any alterations if they are needed. I hope you win!!
I voted for your dress...it is delicious, vintage and yet so very NOW!!! Good job!!!
Love this dress! You got my vote : )
WOW! I definitely voted for you...you are the best one for this challenge by far! It looks like you spent a lot of of time on the dress and it totally paid off because it's a really cute dress and looks just like the modcloth one. Nice work, i hope you win!
Thank you for the tutorial! I'll try to do it for this summer
adorable!
So cute! I love it!
Darling dress!
I voted for you!I think your project was way cute and showed a lot of skill and talent. Ruffles hide flaws.
you did a great job - you had my vote!!
So adorable!
I LOVE this dress and the color!! Awesome joB!
Great job!! Love the dress and fabric. TFS and great tute!!
Stopping by from Thirty Handmade Days linky party and your newest follower.
Here is what I shared this week: http://craftybrooklynarmywife.blogspot.com/2012/01/hollys-first-coat.html
Wow that is sew cute...I just love it....Please share this @CountryMommaCooks Link and Greet Party...going on now-Sunday...Have a great weekend!
This is so cute! Love the colour and the totally cute design. You made a fantastic job and this, In fact I voted for your dress yesterday :)
What a great dress! I love everything about it! ~ Barbara
I love it! You did a fabulous job!!
KK
OMG..I wish i can sew like you do...I love Mod cloth dresses and urs is just way too cute
visiting from Iheartnaptime
Oh my, aren't you beyond sunshiney and sweet in your lovely new dress?!? Love it! I'd be so pumped if you'd come and link this (and any other projects you'd like to show off) to the Head to Head Showdown, going on right now at www.icantstopcrafting.blogspot.com ~Jen
What an adorable dress. I love it!
Super sweet frock!
This is amazing! Thank you so much for sharing the tutorial. I love the yellow fabric color!! Makes it look very retro:) You look fantastic in it as well!! Great job.
I love this dress! Thanks for the tutorial!
I LOVE, LOVE, LOVE your dress....the color, the style, every part of it...is pure loveliness.
Wonderful! Looks great on you!
Super cute! Love the yellow!
you are SOO talented! the dress is beautiful!!
WOW! I have been coveting this dress from modcloh for months :o)
What a darling dress! The fit looks great! :) Nice work drafting your own pattern.
This is lovely! Thank you for such an inspiring post.
Post a Comment