I went to a Christmas party on Friday night. And, I wanted something festive to wear. I wore a green sweater (because of course my clothing must color-coordinate with the Christmas theme!) and decided to make myself a festive poinsettia headpiece. (Note: I'm obviously not wearing a green sweater in the below picture. You think I had time to make a headband AND photograph it right before the party?)
And yes, I did make it right before the party. Like, the babysitter is arriving and I'm still hot-gluing.
I pretty much made it up as I went, comparing it occasionally to the poinsettia plant my sweet friend gave me for my birthday. I wanted the middle to be authentic (because that's how I roll) and have the tiny yellow flowers that real poinsettias have amongst their red and green leaves. But, I didn't have any yellow beads. So, dear readers, you know what I used? I used a pair of pliers to cut the heads off of some of my sewing pins and then I hot glued them to the flower. Yep. I'm a little nuts. But, hey, they look cute, right? Mission accomplished.
Showing posts with label Flowers. Show all posts
Sunday, December 4, 2011
Friday, September 30, 2011
Flower Garden Baby Shower
I have a lot of friends who are having their first babies, so I'm throwing a lot of baby showers lately. This is my latest baby shower, a flower garden baby shower!
Having all boys, I enjoy getting to do girly stuff now and then, so this floral baby shower for a sweet baby girl was a lot of fun.
Here's the food table:
My favorite part of the food were these hydrangea cupcakes. (Tutorial from Glorious Treats.)
I also tried out these flower pot cookies. They didn't turn out like I wanted (they don't look much like the original), but after untold hours of working on them, I was going to serve them no matter how ugly they were. Sigh... I need to work on my piping skills.
I should have started them more in advance than I did. Then I would have had time for the frosting to set better so they could actually have stems, rather than just lean against the picks. Oh well, they're kinda cute anyway, if you don't know what they're supposed to look like.
And, of course, we had various fruits and veggies and dips. I got all those cute flower bowls and plates for free from Kohl's and JCPenney. Do you guys get those $10 off $10 coupons from JCPenney and Kohl's? I do, but I rarely shop at those stores, so rather than getting $10 off what I might normally buy, I just find things I like and get them for free. I've gotten pretty good at finding just the right things to come right in at $10. :)
And, like I always seem to do, I served lemonade to drink. It's easy, not fussy, and won't stain my carpet if someone spills. :) This time around, though, the lemonade came with a fun flower straw! (Tutorial from Martha Stewart.)
I've made the Martha Stewart tissue poms before, but this time I made them smaller and turned them into a fun garland.
I liked my pink pom-pom flower garland so much that I kept it up for several days after the party. I couldn't quite bear to take it down, it was so cute. :)
And, of course, you gotta have flowers at a floral-themed Party! I loved having an excuse to buy myself flowers. :)
Having all boys, I enjoy getting to do girly stuff now and then, so this floral baby shower for a sweet baby girl was a lot of fun.
Here's the food table:
My favorite part of the food were these hydrangea cupcakes. (Tutorial from Glorious Treats.)
I also tried out these flower pot cookies. They didn't turn out like I wanted (they don't look much like the original), but after untold hours of working on them, I was going to serve them no matter how ugly they were. Sigh... I need to work on my piping skills.
I should have started them more in advance than I did. Then I would have had time for the frosting to set better so they could actually have stems, rather than just lean against the picks. Oh well, they're kinda cute anyway, if you don't know what they're supposed to look like.
And, of course, we had various fruits and veggies and dips. I got all those cute flower bowls and plates for free from Kohl's and JCPenney. Do you guys get those $10 off $10 coupons from JCPenney and Kohl's? I do, but I rarely shop at those stores, so rather than getting $10 off what I might normally buy, I just find things I like and get them for free. I've gotten pretty good at finding just the right things to come right in at $10. :)
And, like I always seem to do, I served lemonade to drink. It's easy, not fussy, and won't stain my carpet if someone spills. :) This time around, though, the lemonade came with a fun flower straw! (Tutorial from Martha Stewart.)
I've made the Martha Stewart tissue poms before, but this time I made them smaller and turned them into a fun garland.
(Picture by TiffanyB Photography)
I liked my pink pom-pom flower garland so much that I kept it up for several days after the party. I couldn't quite bear to take it down, it was so cute. :)
And, of course, you gotta have flowers at a floral-themed Party! I loved having an excuse to buy myself flowers. :)
Friday, September 2, 2011
Lots and Lots of Flowers
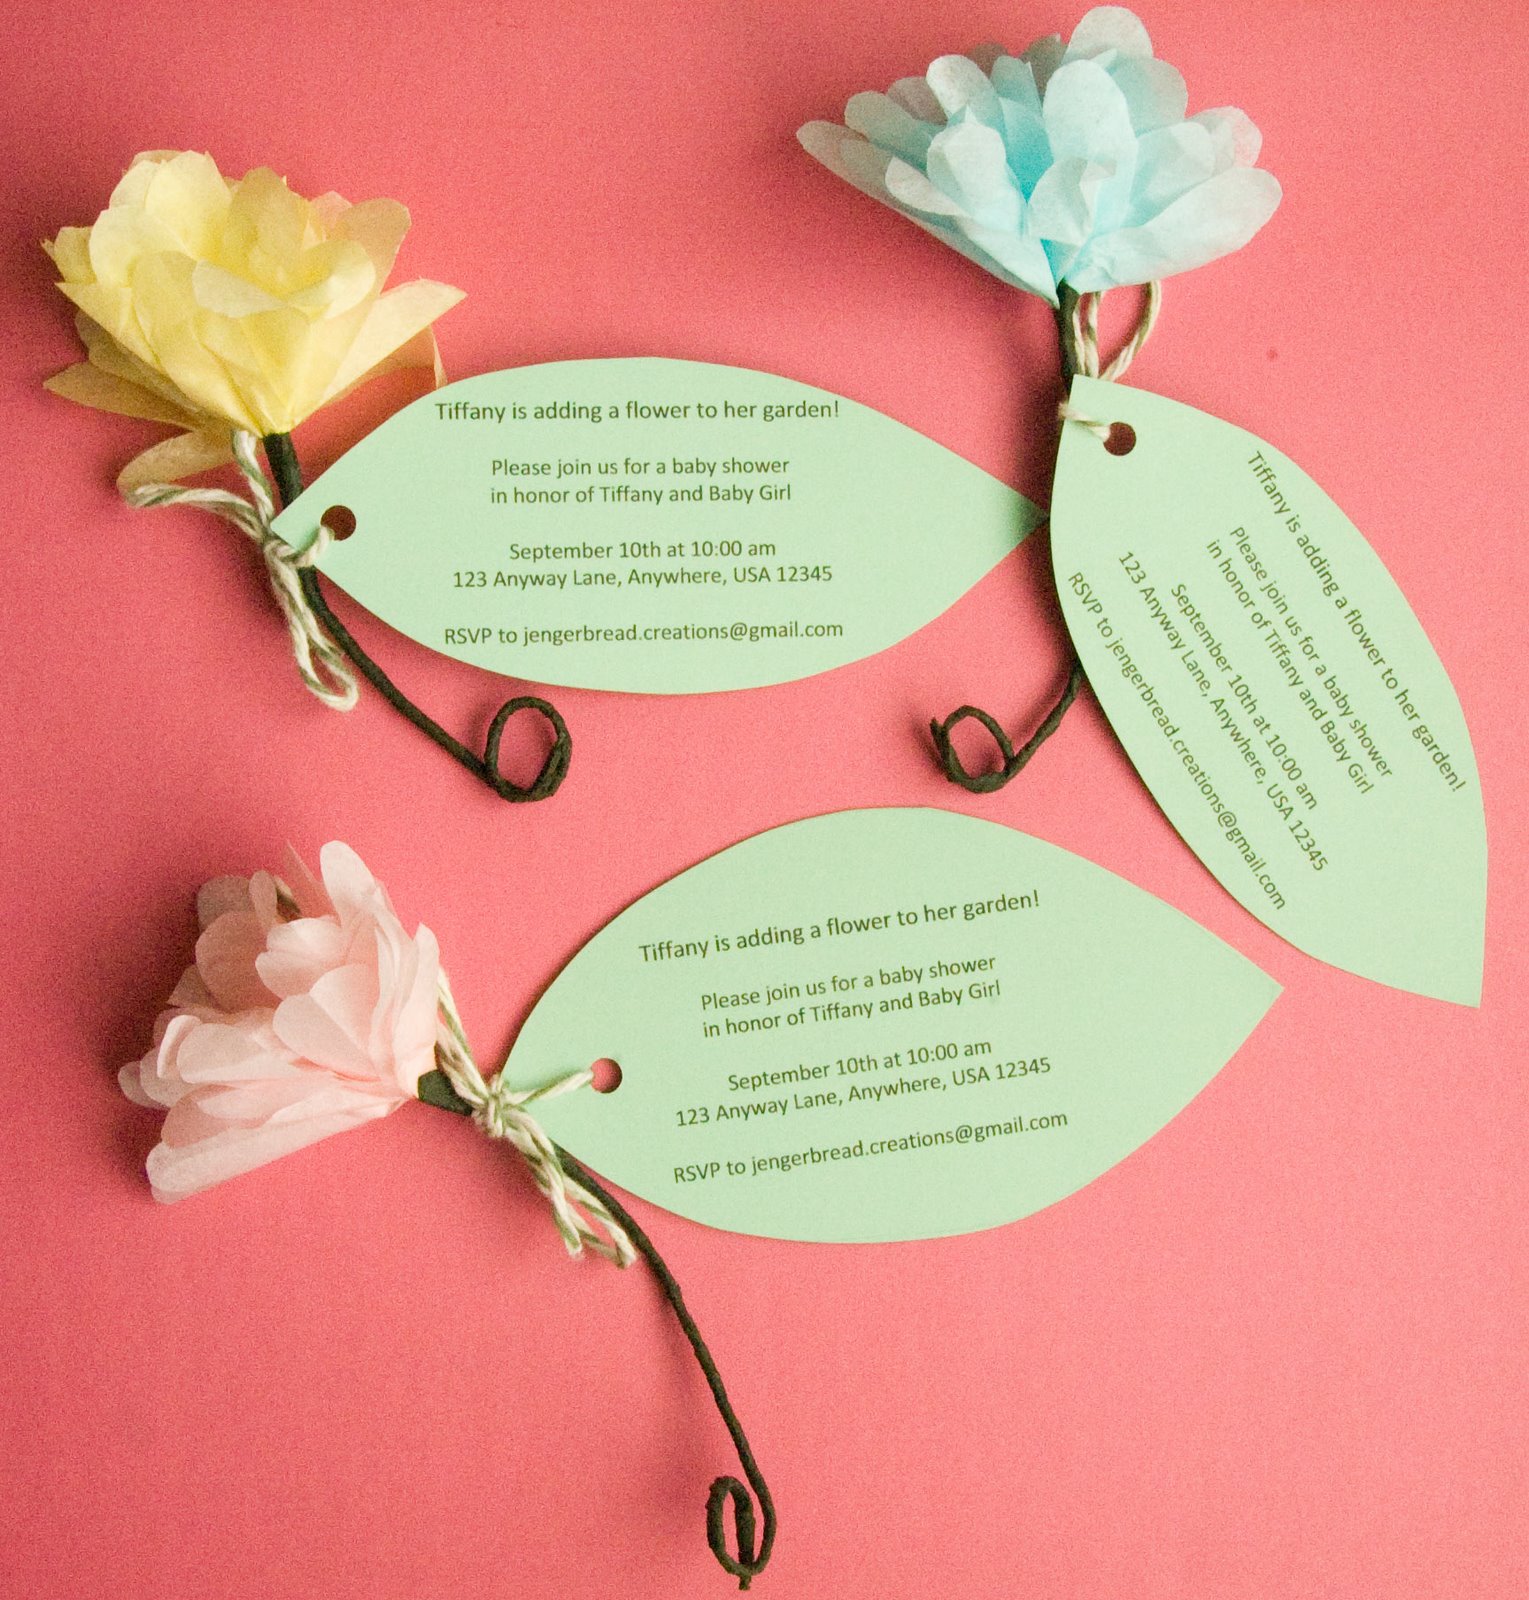
I've been making lots of tissue paper flowers this week. I'm throwing a "flower garden" baby shower for a friend. These are the invitations I made:
I got the idea from Inchmark. It's a nice departure from typical party invitations, don't you think? And, I was still able to mail them. The tissue paper pressed flat very prettily.
All the little flowers were so pretty, I almost didn't want to mail them out!
Friday, May 13, 2011
Flower Hairclip Tutorial
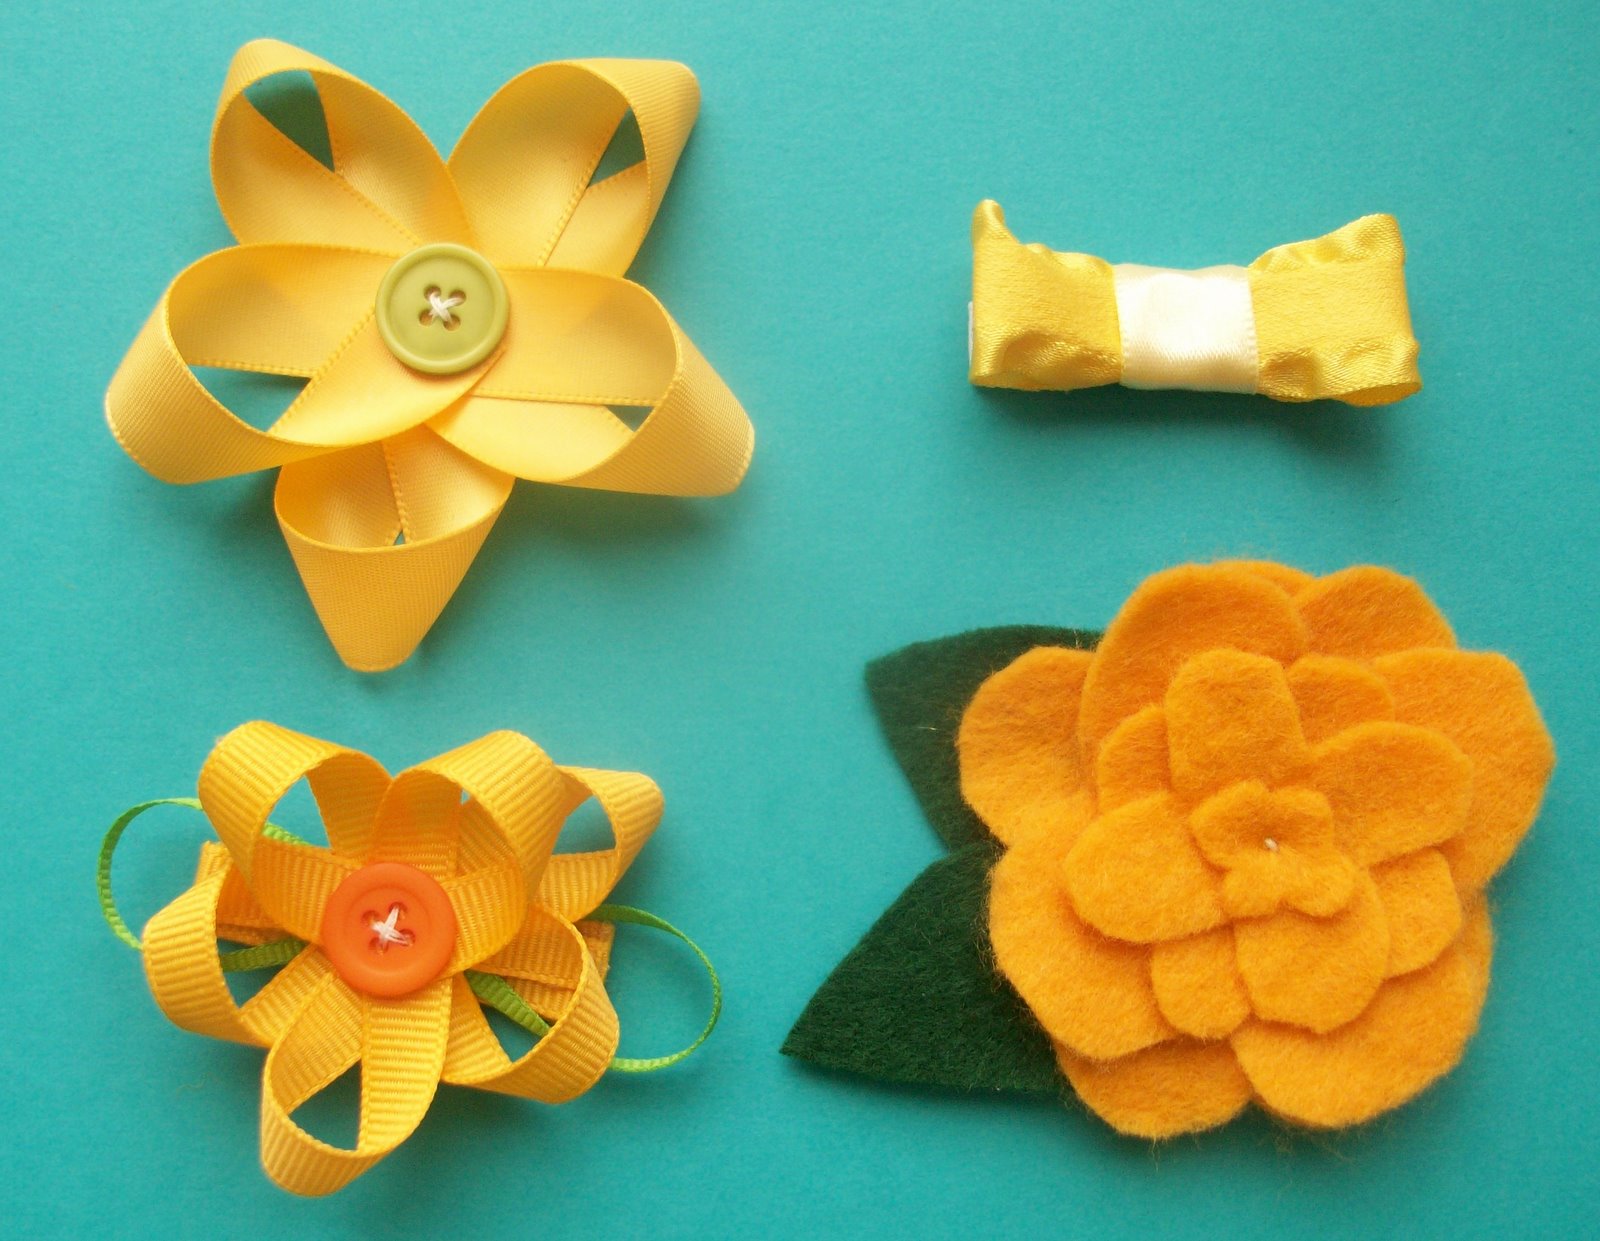
My sister asked me to make my niece a few hairclips to go with her Easter Dress. Here's what I came up with:
4. Repeat steps 1 though 3 with the wider ribbon.
7. Cover your hair clip with ribbon, using hot glue.
8. You’re done! Now you have a cute hairbow for a sweet little girl in your life.
She chose to wear the felt one. Here is my sweet niece modeling the clip for me in a field of tulips:
Now, being a mom of only boys, I'm rather new to hairclips. While getting ideas for the clips, I saw some ribbon flowers in the notions section at the fabric store, and thought I'd try to figure out how to make some like that out of my own ribbon. Perhaps this is old news to you ladies out there who have little girls, but it's new to me. :)
This is the clip we'll be making today:
You'll need:
1 narrow green ribbon
1 medium grosgrain ribbon in your desired color
1 button
Needle and Thread
Hair clip
I’m sure you could use hot glue for this tutorial, but I found it to be easier with needle and thread.
1. Poke your needle through the end of your green ribbon.
2. Loop ribbon around to make a leaf shape, push needle through second layer.
3. Repeat on other side4. Repeat steps 1 though 3 with the wider ribbon.
5. Keep adding loops until you like the look of your flower. I made 5 loops.
6. Add your button to the center of your flower. Sew button on, through all layers of ribbon. Clip off any extra ribbon.7. Cover your hair clip with ribbon, using hot glue.
8. You’re done! Now you have a cute hairbow for a sweet little girl in your life.
Friday, April 29, 2011
Card Club
A few friends and I have a card club. When I started going, I really didn't know how to make cards. But I went anyway, for the fun of it. I learned as I went along, and I think I'm getting better. These are the cards I made for last night's meeting:
But, I think this one, in purple, is my favorite:
I made them from the Flower Card pattern/tutorial at mmmcrafts. Some day I'l get good enough at this card-making thing to come up with my own designs. :)
I had fun picking the fabrics out of my fabric scraps. I like the blue and red ones, and the green and red ones a lot.
But, I think this one, in purple, is my favorite:
It got given away in our card swap last night. I think I might need to make another one for myself. :)
Tuesday, April 12, 2011
Sculpey Flowers and Necklace Tutorial
Okay, so here is the Sculpey Flowers tutorial I promised! I'll show you how to make a pretty rose out of Sculpey, as well as how to make the necklace below:
1. Work the Sculpey (or whatever other brand of polymer clay you're using) until it's easily pliable. Squish it and twist it until it is soft. I was trying to match the color of the flowers to the color of my dress' sash, so I blended two colors together to get the color I wanted.
2. Take a piece of Sculpey clay and place between two layers of wax paper. On top of the wax paper, use some sort of rolling pin to roll out the clay (I used a heavy drinking glass, because I didn't want to get any clay on my wooden rolling pin, though I needn't have worried with the clay between the sheets of wax paper).
3. Find something to cut out small circles in your clay. I used a very small cookie cutter (from a set of several sizes of round cookie cutters), and two different sizes of decorating tips that I had on hand.
4. Cut out a circle of clay with your smallest cutter.
5. Place the circle you cut in between two layers of wax paper.
6. Roll out some more, until about as thin as 1/16th of an inch
7. Gently peel the circle off the wax paper and roll up, like an enchilada, or a spiral. Repeat the cutting and rolling out process (steps 4-6) again with a slightly larger circle. Put it on the side of the previously rolled "spiral tube," or center of the flower. Press down on the bottom part of the "petal" so that it adheres to the bottom of the flower center. Shape the edges of the "petal" so that it looks more like a rose petal.
8., 9., 10. Repeat the cutting and rolling out process for each new petal, using a slightly larger cutter as you get closer to the outside petals. Place the petals onto the flower center, off-setting to make it look more natural.
11. Shape the flower petals so they look less like circles. Press them out so they aren't standing straight up.
12. Get some eye pins.
13. Push an eye pin through the bottom of the flower.
14., 15. There will be a long "stem," from all the times you squished the clay petals together. Cut it off with scissors.
16. Paint on a glaze (I used Studio by Sculpey Satin Glaze) with a small paintbrush.
17. Let glaze dry for 30 minutes.
18. Bake according to manufacturer's directions. I placed mine on parchment paper on the cookie sheet just in case, so nothing would stick to my cookie sheet.
19. To make the necklace shown, curl and close the straight end of the eye pins with a pair of jewelry making pliers (I bought a pair for around $2 from the Walmart craft section) and connect to the other flowers' eye pins with jump rings. Attach to a chain with jump rings. (I bought a chain of the length I wanted at Hobby Lobby, cut it in half with a wire cutter, and attached jump rings to each cut end).
20. Wear and enjoy!
Tuesday, April 5, 2011
Pink Plaid Dress
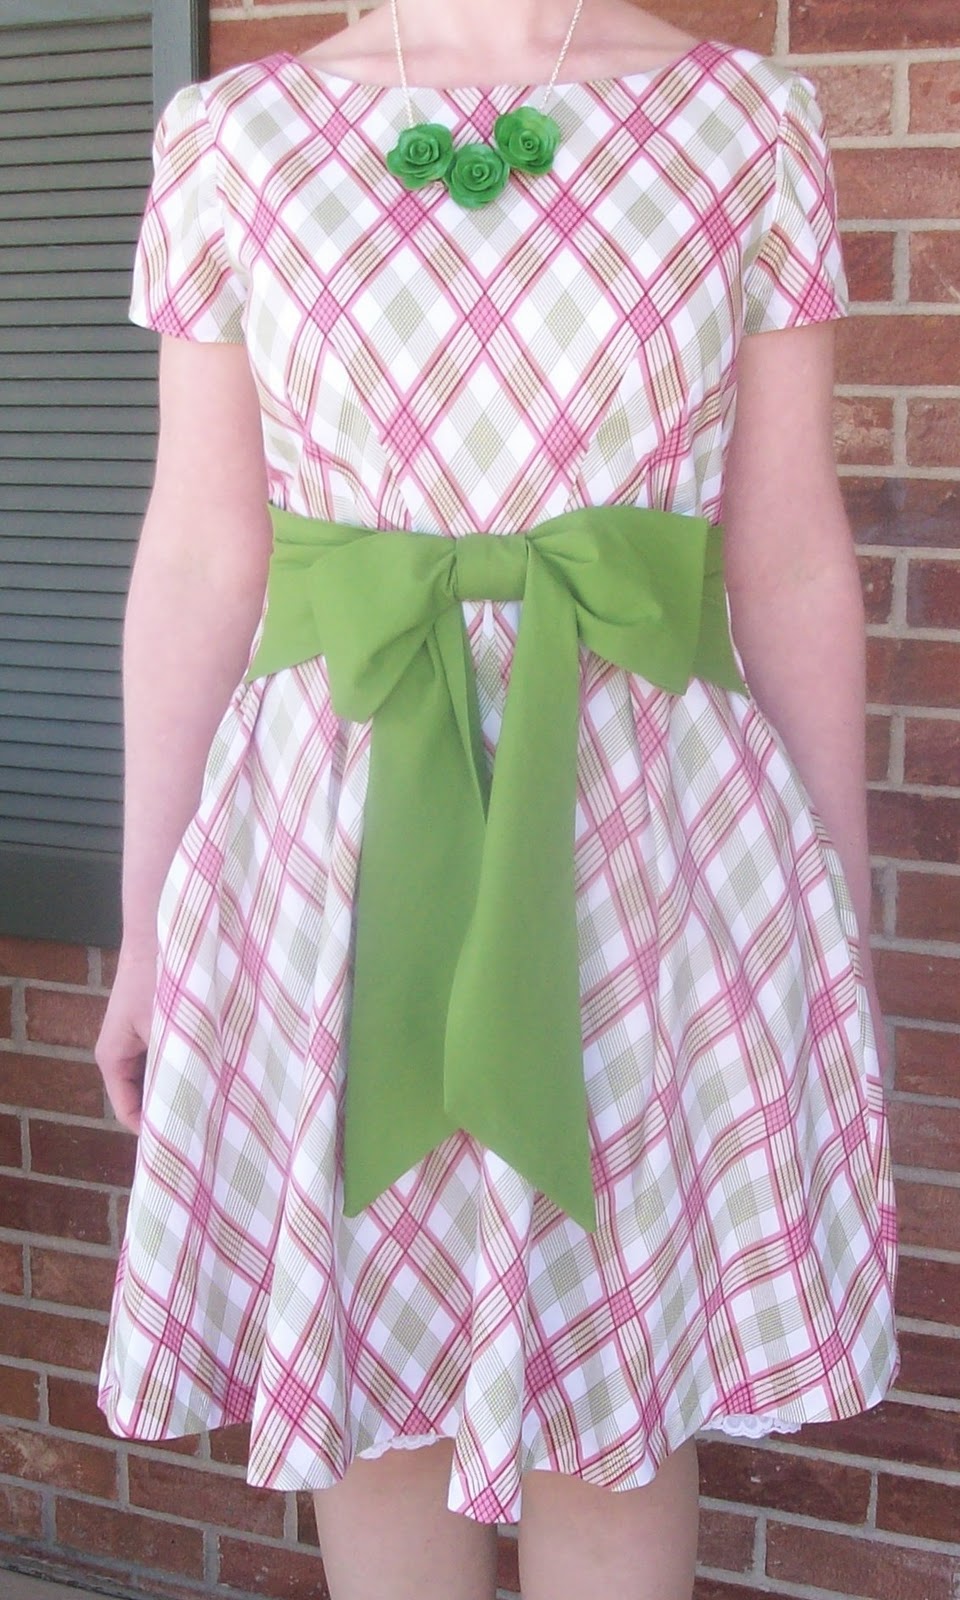
This dress is my latest creation. It's made from Simplicity 2444. And, check it out: It has pockets! I love dresses that have pockets. :)
I thought it needed a necklace, with that higher neckline--a little bit more visual interest across that field of plaid.. But, I didn't have any necklaces that looked right. So, I went back to my trusty Sculpy roses, and made another necklace!
This time, I took pictures as I went and I'm putting together a tutorial for you, so you can make your own rose necklace! Look for it later this week or early next week!
Linking here.
Linking here.
Wednesday, March 30, 2011
Rose Necklace
Several months ago, some friends and I were sitting around talking and joking and somehow we got talking about how cool it would be if we had a "Prom." Well, we actually carried out our idea and had a Couples Night Formal. It was AWESOME. I haven't had that much fun in a long time. It was like taking all the good things from high school and college formals and stake dances and leaving out all of the bad things. I had a blast.
Most of us wore old high school and college formals. Mine was an old bridesmaid dress. I couldn't find a necklace I liked to go with my dress, though, (and I didn't want to look like a 29 year old trying to look like a 16 year old, so I eschewed my old rhinestones and "formal" necklaces). So, I made one.
I wanted to make a necklace using those lucite flowers I've been seeing a lot on Etsy these days, but didn't have the forethought to order any online ahead of time (and they're not available in local stores). So, I made my own flower bead with Sculpy and made my own necklace.
Most of us wore old high school and college formals. Mine was an old bridesmaid dress. I couldn't find a necklace I liked to go with my dress, though, (and I didn't want to look like a 29 year old trying to look like a 16 year old, so I eschewed my old rhinestones and "formal" necklaces). So, I made one.
I wanted to make a necklace using those lucite flowers I've been seeing a lot on Etsy these days, but didn't have the forethought to order any online ahead of time (and they're not available in local stores). So, I made my own flower bead with Sculpy and made my own necklace.
I thought it turned out beautifully, and have made another one to go with another dress, and will be posting a tutorial for the flower beads soon. :)
Photos by TiffanyB photography
Monday, February 28, 2011
Flower Pins
I made these cute ribbon flower pins, using this great tutorial at Make It Do. .
Who needs to spend $18 for flower pins from Anthropologie when you can make these cute ones with $2 worth of ribbon?
Subscribe to:
Posts (Atom)